Inner frames in photography
Also known as a "frame within a frame," this is a powerful yet simple photography technique. When done correctly, it can elevate certain photos from feeling like simple snapshots to creative, layered images. Here's everything you need to know about creating inner frames within your photography.

All photos have a literal frame: the edge of the photograph itself. From here, however, we can create a second, inner frame using elements within the scene to draw attention to your main subject.
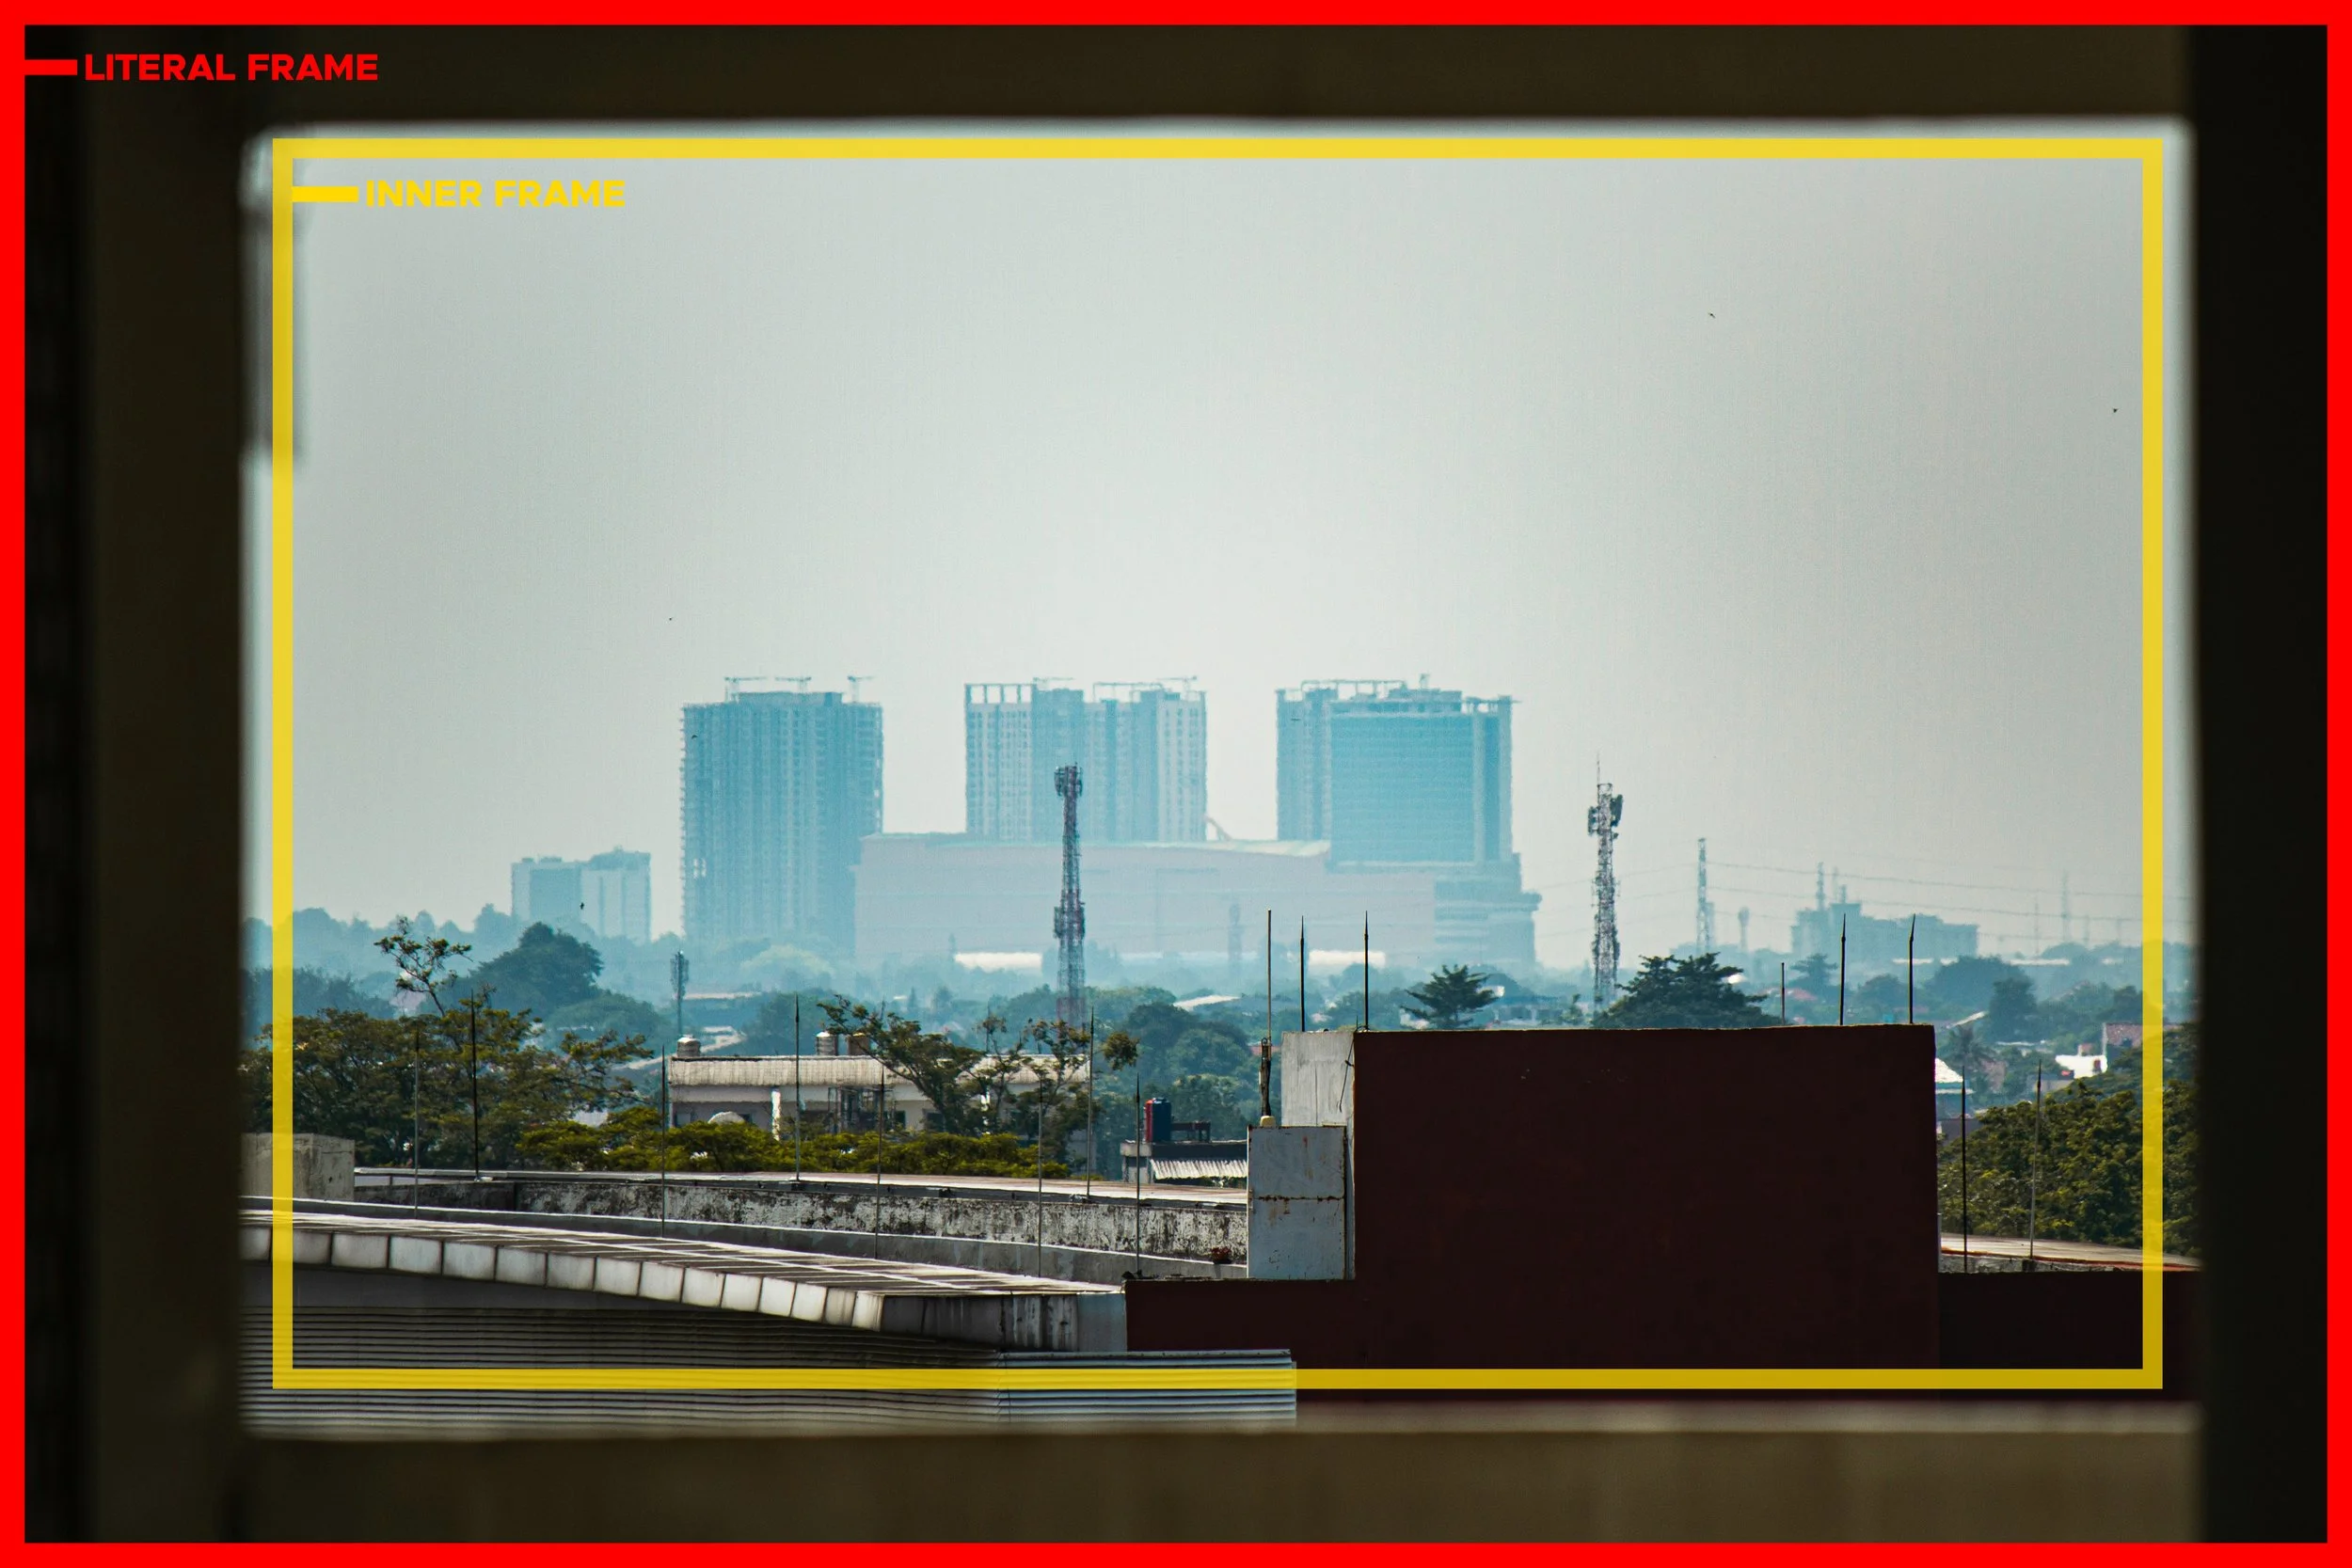
Photo by Affan Fadhlan
Your inner frame can be as obvious or subjective as you desire. Get super creative or keep it simple – the choice is yours.
In the example below taken by Brannon Naito, you can see the upper staircase has been used to create an awesome triangle framing the subject on the staircase below.


Popular choices for inner frames include man-made things such as doors, windows, archways, and hallways. You can also use parts of nature, like trees, branches, and flowers. Props are another option if that's something you're into. You can even use negative space or light to create a frame. In doing so you create a sense of depth and dimension within the photo and the use of inner and outer frames can add a bunch more context to the entire scene.

Photo by DISTANTMEDIA
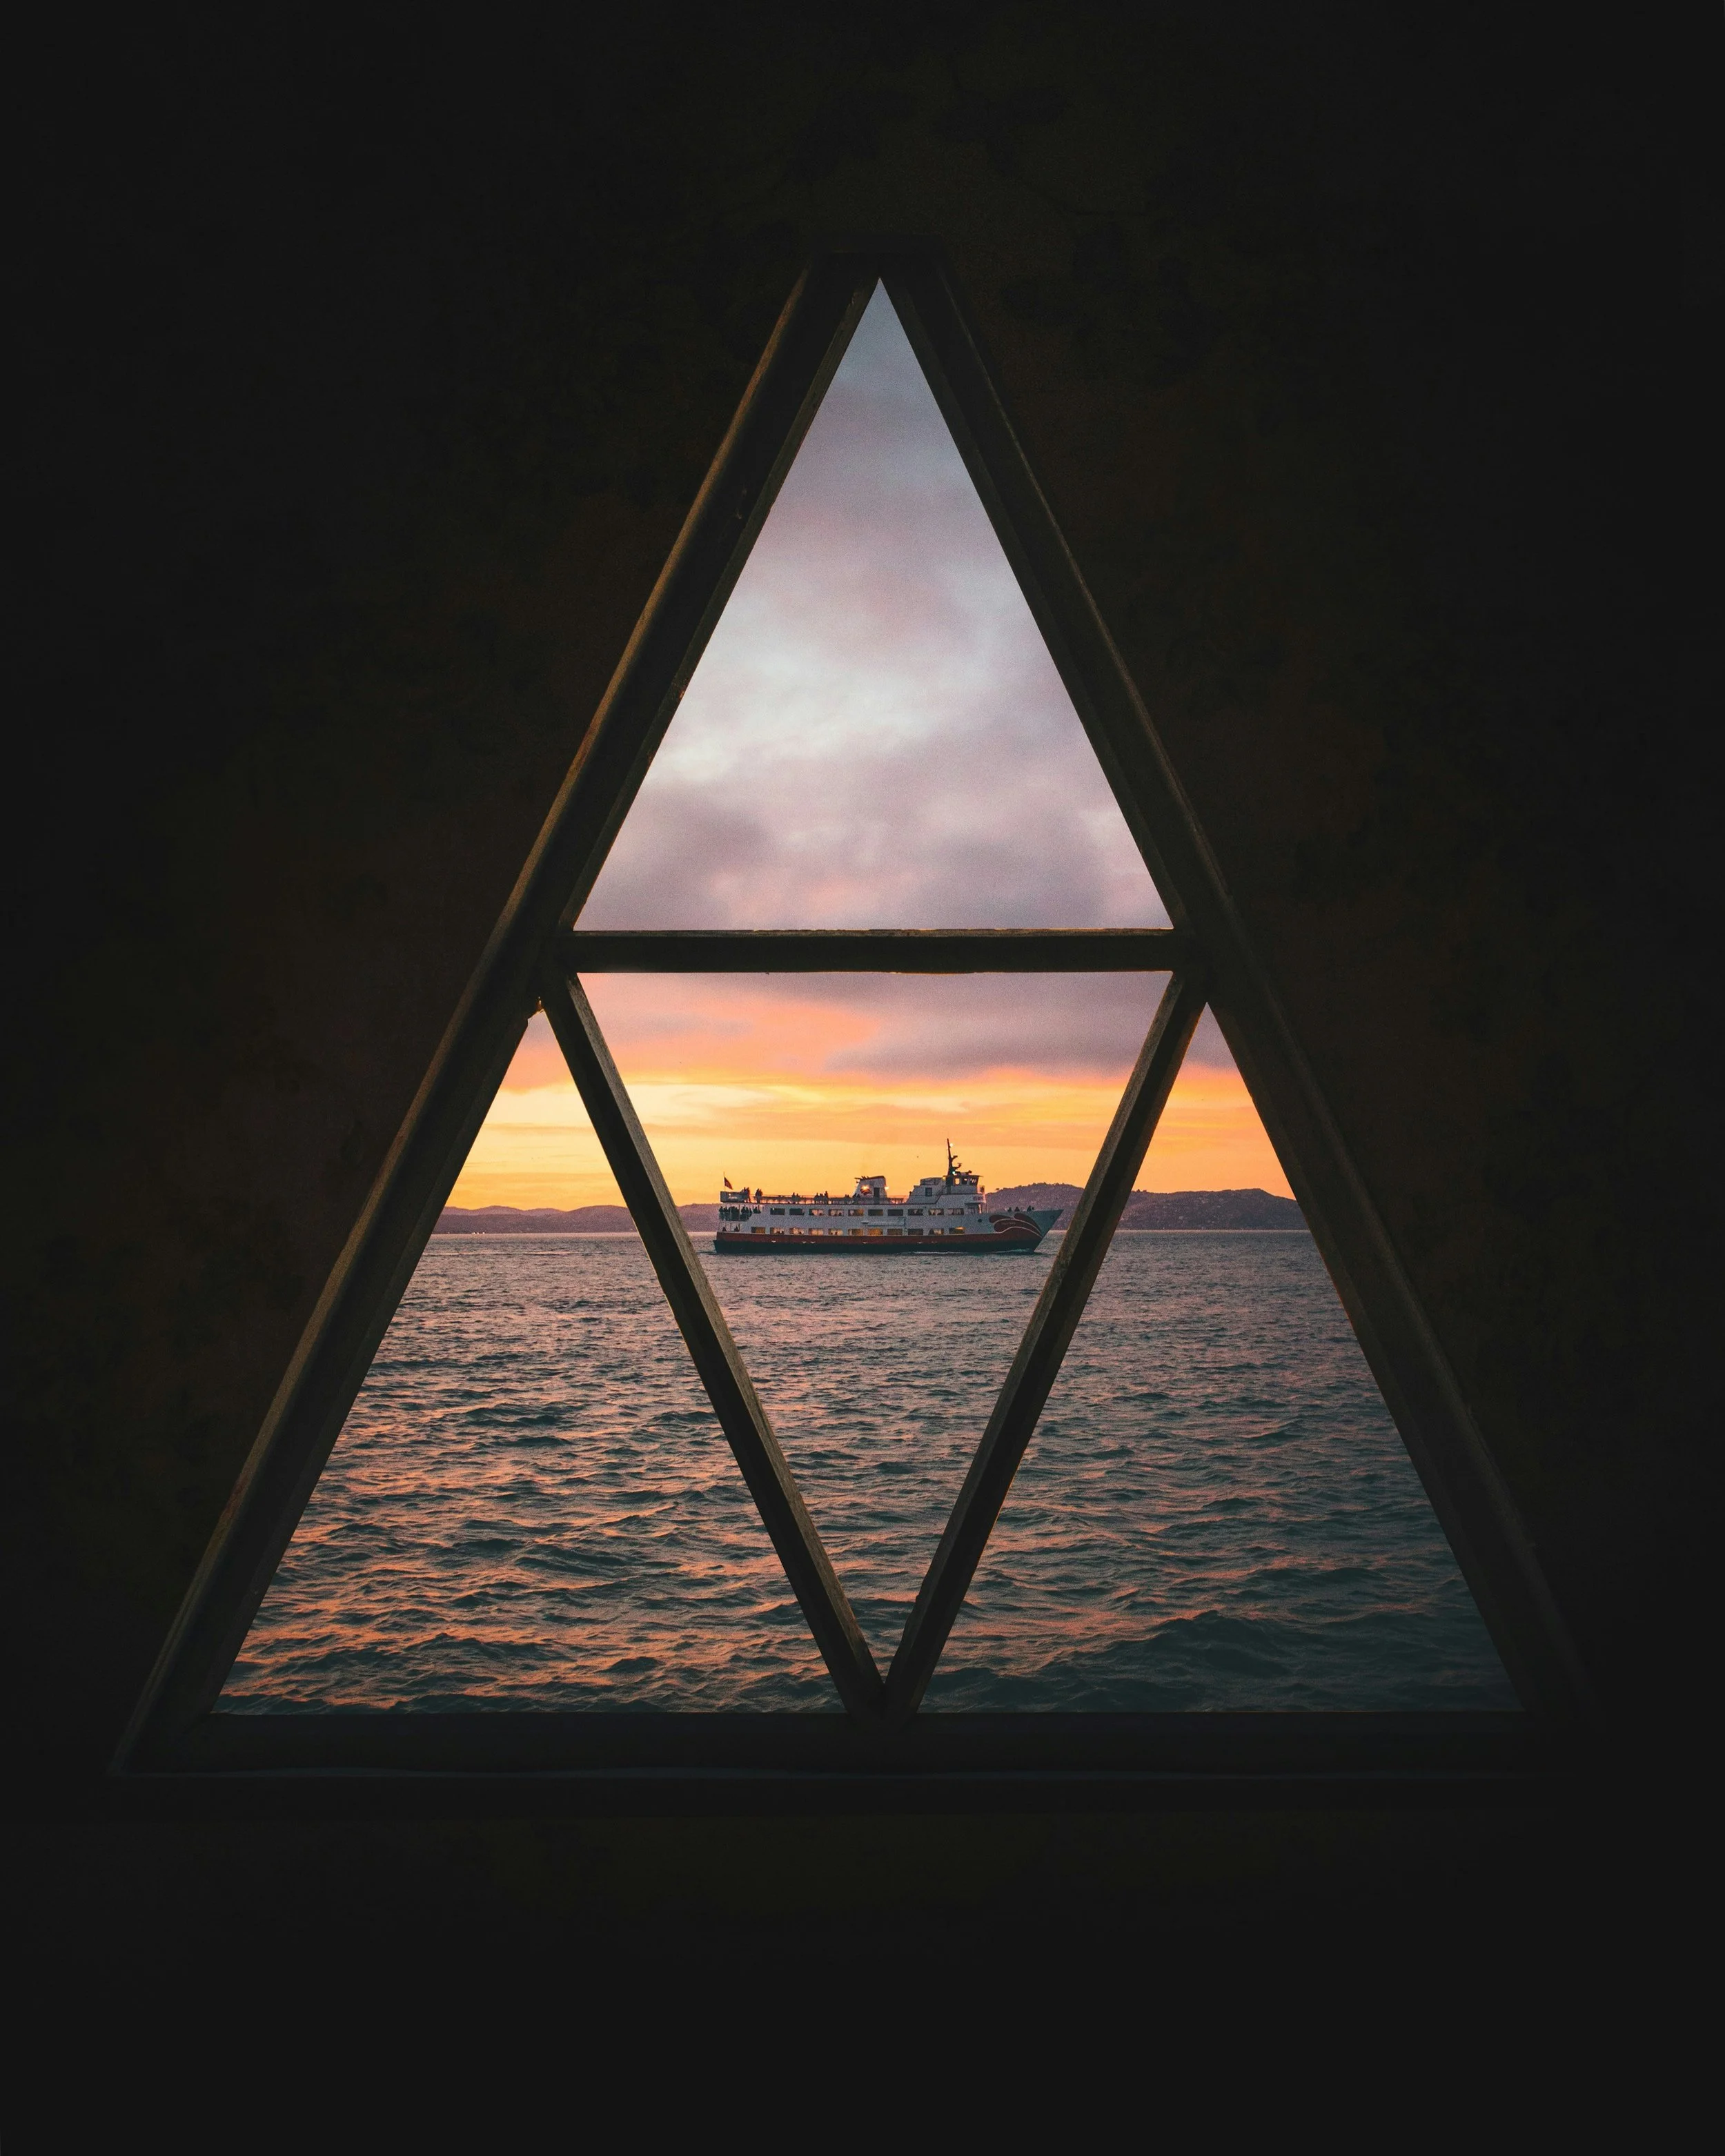
Photo by Jaredd Craig
For example, in the shot below, without the doorway framing the view, you'd simply be looking at a photo of a lake. But with the doorway, you now have an image that's twice as dynamic and tells a much richer story about the location. You can imagine these doors swinging open, greeting you with the outdoors. They also open the mind to not only the view but the building itself, almost as if you’re getting twice the value in the same frame.

Photo by DISTANTMEDIA

Using a background archway catching the light, to frame a silhouetted figure in the foreground. Photo by San Htun.

A fantastic example of using negative space and the horizon divide to draw a line across the frame allowing the subject to sit in one half. Photo by Jake Melara
It doesn't have to be a ‘‘normal’’ or complete shape like a window or door to be considered good framing. You can use the way certain elements flow around a scene to direct the viewer's eye into it. Depth of field can also be used to create portions of the image that are blocked off, again sending the viewer's eye towards the subject.

Placing your framing in different parts of the composition. Photo by Uy Rogelio

Using depth of field to frame your subject. Photo by Shawnanggg
Experiment with placing the inner frame in different parts of the composition. We often think of this technique as looking through something to see what's on the other side, but you can achieve this style just as well with elements behind your subject, like in the image below where the window clearly sits behind, but still nicely frames the silhouetted figure.

Photo by Ulziibayar Badamdorj
You could even have your subject positioned directly in or at the end of the frame, or you could use the outline of one subject to nicely frame a secondary subject. Definitely give this technique a go next time you’re out taking photos, and as always feel free to check out the more in depth video version of this blog post via my YouTube channel below.